So, I have started planning how to make an Android game I have an idea for. This is meant to be something that is akin to an adventure you can have with your friends.
This introduces a few little challenges for myself. Getting AR to work on my device, and getting the maps to work. This may, or may not, be a fun experience.
This started out from the fact that I used to play tons of Pokemon games. On this DS, then 3DS, and then I played a lot of Pokemon GO. I grew tired of Pokemon GO, unfortunately, then Minecraft Earth was shown by Mojang and I would love to get that.
While I will get Minecraft Earth as soon as I can, that isn’t what is happening today. So, I figured why not take a step into developing a game that uses maps, and also AR. This doesn’t share the idea I have in mind, only this is working through the first steps.
Step 1: Let’s Go AR
We first step into AR through ARFoundation. This is mostly sharing the experiment and what was done to get it working. I am sure you most likely have knowledge of Unity, you know what you would want to do for Android or iOS, and the assets in what is used should be shared as we step into everything.
I am using Unity 2019.1 for this, obviously creating a new blank project for this. We create a blank 3D project for ourselves.

The next step is opening Project Settings so we can adjust the Player settings. We adjust the company name, product name if it needs changes, and under Android we got to the Other Settings and make a package name. Mine happens to be com.edg3.arandroidtest. Take note, we may need to change other settings, such as Automatic Signing, when using iOS.
Under XR we enable ARCore Supported, take note this notifies us we also need to change the Graphics API. So back under Other Settings we just remove Vulcan from the Graphics APIs as requested.
I chose to set the Target API to Android 8.0 Oreo. We also turn off Multithreaded Rendering. That completes the settings we should need to change.
Next, opening the Package Manager, we go Show Preview Packages under Advanced. We add ARFoundation, and ARKit for if you want the iOS support. Under GameObject, we now have the added XR functions.

We next add an AR Session object to our scene, followed by an AR Session Origin object. We can remove our default Main Camera and set the tag for the AR Camera under the Origin to MainCamera.

For the test, we create a 3D Object for ourselves in the scene. I chose a cube to start.

So, on the technical side from Unity, 1 in the Scale of an object is 100cm in real life. So, for simplicity, we make the scale a tenth of that to 0.1 scales. We then move its coordinates to (0, 0.5, 0) co-ordinated for ourselves so it will be “above” the surfaces.
Attempting to build brought a few problems. Firstly, in Project Settings, searching for “arc” requirement was created and added to set to Required. Also, it is important to note that within your Android Studio you should make sure your SDK is installed, mine happens to be 26, and it, unfortunately, wasn’t.
Compile it, run it on my Huawei P8 Lite, I am getting an issue with a black screen…

So, looking around I saw reports that using SDK 26 it happens to not work for other developers, yet 24 it works for them. This doesn’t seem to work. Fiddling with versions, adjusting the settings above, and more. Yeah, I hit a stumbling block at the moment.
Looking around I found there are sample projects using ARFoundation, so I figured I will take a look at that. As it turns out my P8 Lite doesn’t have ARCore and doesn’t support it. Oops. My device isn’t compatible with this version, yet I need the latest ARCore.
This is a stumbling block for me, my personal phone cannot get ARCore. I will go through checking on friends and family to see if I can get a phone that currently supports ARCore. We will move back to this in the future.
Step 2: GPS Maps
So, I figure I should point out you need to set up the package name, this is in a new project for the testing.
Firstly, we begin by getting the GPS for Unity to use. Making a script GpsLocation for ourselves. This happens to be easy to understand, we need actual coordinates for ourselves.
public class GpsLocation : MonoBehaviour
{
    public float Latitude;
    public float Longitude;

    public static string LatLon { get; set; }

    void Start()
    {
        if (Input.location.isEnabledByUser)
            StartCoroutine(GetLocation());
    }

    void Update()
    {
        Latitude = Input.location.lastData.latitude;
        Longitude = Input.location.lastData.longitude;
        LatLon = "Lat: " + Latitude.ToString() + "\n" +
                 "Lon: " + Longitude.ToString();
    }

    private IEnumerator GetLocation()
    {
        Input.location.Start();

        while (Input.location.status == LocationServiceStatus.Initializing)
        {
            yield return new WaitForSeconds(0.5f);
        }

        Latitude = Input.location.lastData.latitude;
        Longitude = Input.location.lastData.longitude;

        yield break;
    }
}
As you can tell, this is just bland, it just makes sure we can access the GPS correctly. Obviously, there are definitely a few more things for us to do, we just won’t worry about that in this prototyping stage.

The next step happens to be a system using GPS signals for ourselves. There are a few things we need. Firstly, we move access to static variables for ourselves. Secondly, we add mathematics to track the bearing in GpsLocation.
    public static double DegreeBearing(double lat1, double lon1, double lat2, double lon2)
    {
        var dLon = ToRad(lon2 - lon1);
        var dPhi = Math.Log(Math.Tan(ToRad(lat2) / 2 + Math.PI / 4) / Math.Tan(ToRad(lat1) / 2 + Math.PI / 4));
        if (Math.Abs(dLon) > Math.PI) dLon = dLon > 0 ? -(2 * Math.PI - dLon) : (2 * Math.PI + dLon);
        return ToBearing(Math.Atan2(dLon, dPhi));
    }

    public static double ToRad(double degrees)
    {
        return degrees * (Math.PI / 180);
    }

    public static double ToDegrees(double radians)
    {
        return radians * 180 / Math.PI;
    }

    public static double ToBearing(double radians)
    {
        return (ToDegrees(radians) + 360) % 360;
    }
Thirdly, we make the character rotate according to the GPS orientation.
public class GpsRotation : MonoBehaviour
{
    private float lastLatitude;
    private float lastLongitude;
    void Update()
    {
        // If it is still zero we dont worry
        if (lastLatitude == 0.0f)
        {
            lastLatitude = GpsLocation.Latitude;
            lastLongitude = GpsLocation.Longitude;
            return;
        }

        // Get Differences
        var difLat = lastLatitude - GpsLocation.Latitude;
        var difLon = lastLongitude - GpsLocation.Longitude;

        // We have movement
        if (difLat != 0 || difLon != 0)
        {
            var deg = GpsLocation.DegreeBearing(lastLatitude, lastLongitude, GpsLocation.Latitude, GpsLocation.Longitude);
            transform.Rotate(0, (float)deg, 0);
        }

        // Update
        lastLatitude = GpsLocation.Latitude;
        lastLongitude = GpsLocation.Longitude;
    }
}
Now, there are definitely flaws in this. Technically, it would be better to use actual maps, I’m sure you can understand that. For simplicity, this is literally a prototype to see where the ideas can go for this.
We then add a little to the condition for rotation:
        // We have movement
        if (difLat != 0 || difLon != 0)
        {
            var deg = GpsLocation.DegreeBearing(lastLatitude, lastLongitude, GpsLocation.Latitude, GpsLocation.Longitude);
            transform.Rotate(0, (float)deg, 0);

            transform.Translate(new Vector3(difLat * 10000, 0, difLon * 10000));
        }
Take note, this was just to see it working, these aren’t the coordinates and scale we will use in the future necessarily.
Then, for the simple camera following the player:
public class CameraTargeting : MonoBehaviour
{
    public GameObject target;

    void Update()
    {
        gameObject.transform.position = target.transform.position + new Vector3(0.0f, 3.5f, -15.0f);
        gameObject.transform.LookAt(target.transform);
    }
}
You can see it is something that we can use. Sure, it doesn’t rotate currently, it also doesn’t seem to have anything for making it a game. That will now step forward into today’s prototype.
Step 3: Starting Play Introduction
This now has a few simple ideas for this prototype. Firstly, it is unfortunate that with my phone I couldn’t get Step 1 complete. Due to that we, unfortunately, cannot do a full prototype.
So, I cannot step into prototyping the AR features for the game. The next thing happens to be setting up a system for loading the background maps. These happen to be background maps for the prototype simplicity. Just note, while talking about the steps here I won’t be sharing what I did, just hopefully where I get to at the time of sharing this post.
We will have 3 different background maps, these will generate from the GPS coordinates with no problem. Starting from (0,0) being the players starting location we will have the one diagonal on the one side be the -1 tile in the 3, similarly, the other diagonal will be +1. This way we should be able to move between areas by walking.
Next happens to be updating the camera to rotate around the character. This way you can look around you in the world. This will be followed by a random square distributed circle of access for the player.
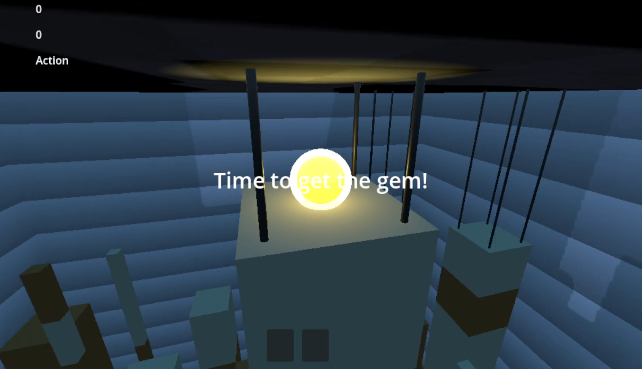
The world will generate items outside of the circle of access for the player, then highlight that direction for the player. When the player walks into range of that object it will show on the screen for them. While the highlight may suggest the idea of the object, you would only know when you pick the actual object up.
You can no doubt understand, the idea for the AR was to make this potentially be to show where the objects are. Also, note that these are not the main mechanics of the entire game. The literal prototype here is to see how that system will look, and feel, for the player.