After finishing last month’s novel, Start Finishing, I’ve realised I have too many code projects sitting in a state of incomplete. I considered it for a while, and finally decided on a simple action plan. I realised the easiest way to complete my personal projects would be to easily allow collaboration and continuous improvement, with an easy speedy method to see all progress on each project of mine. This is the mindset behind DevOps, the intention is to improve and shorten the system development lifecycle.

As I was completing the book last month, I started my own Kanboard, as shown in the image. I followed the five-project rule and made considerable progress on my novel, between around 08/26 and 09/08, as I intended to enter a competition by publishing Accidental Distances. While the progress felt good, nearing completion of my first edit, my personal code projects which I enjoy dwindled into paused status. Since it was all managed through my own personal local git repos, it never has progress visibility. It didn’t feel good to have them become less important since I was taking the Kanban approach and prioritised the competition entry first.
I will also move my personal Kanban board to my Raspberry Pi Zero 2 W, instead of my WSL2 instance on my personal machine, but project management wasn’t the focus I needed on my projects. Looking around, and reading up on all options I could find, I decided to make my own Gitea server. Gitea is a lightweight platform to organise DevOps though, so it is beneficial for a team, and I wanted to be able to go anywhere to work on any collaborative project without requiring a connection to the internet.
Yes, without the internet. The goal is to have a way to share code with others in a local setup where one can even do code reviews, and pull requests, with ease. Consider going somewhere to attend a game jam, such as Global Game Jam, and the venue only has 5G access, but all cell towers are down due to Load Shedding? The team I am on can easily collaborate with a portable DevOps oriented git server setup. Sure, it’s an unlikely situation for most to need this, but I find it great to review my own code projects as a whole, anyway.

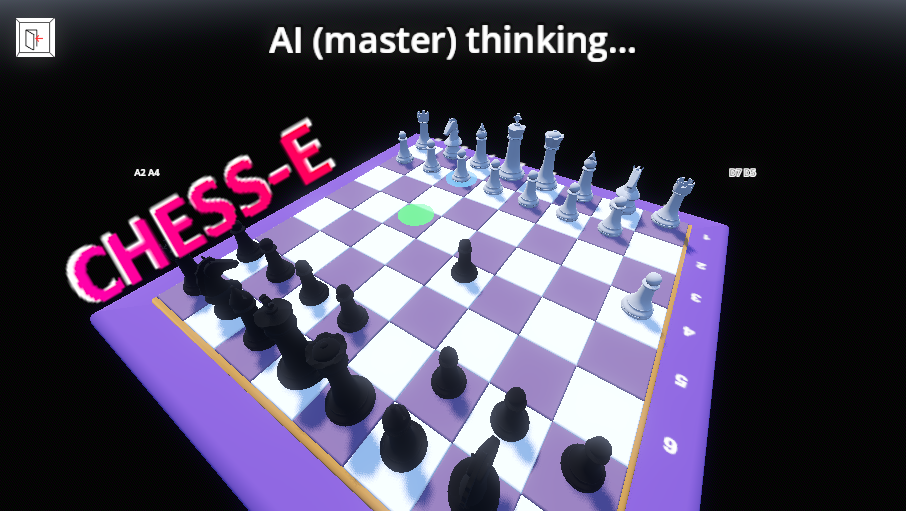
While a few things are a little buggy in the setup, such as the avatars, the system is in a usable state. I have also added a few small features, for instance for the game jam example mentioned above, but the system needs only a small number of customisations further. The biggest one being a button to disable the Wi-Fi hotspot and go through a list of Wi-Fi networks to connect to which you can specify, and a web interface to manage that list, but I’m just working on the plan for this solution so it’s manual network setup for now.
Ignoring that, the git commits track the date and time, so if the Pi date and time don’t update it will show on Gitea as commits in the supposed future, this occurs since I create a Wi-Fi hotspot, much like my Pi camera.

Create Your Own Pi Gitea Server
Start by getting yourself a Raspberry Pi. I would recommend a Zero 2 W just since it is so small, and you don’t need a USB Wi-Fi dongle. You can always try out other options, it’s just what I used for this project since I needed to work out how to use all my Raspberry Pis before I buy yet another one.

1. Flash the image
I used raspios-bullseye-armhf.img.xz as of 2023/05/03 – I recommend setting up the configuration under Advanced Options to your desire. You should connect it to your Wi-Fi network even though we will make a hotspot.
The one reason behind the use of a version of RaspiOS with a desktop is it makes the Wi-Fi hotspot process easier, somewhat. By using a 256gb microSD card for the OS means we’ve got tons of space for the repositories, and don’t need external storage. I also enabled SSH, as shown in the image above.
2. Boot the Pi, go through the setup
3. Update all packages
sudo apt update
sudo apt upgrade -y
sudo reboot
4. Install git, and mariadb (mysql)
With the mysql server install, pay attention to the config you choose, as it will adjust steps further on depending on what you choose.
sudo apt install git mariadb-server -y
sudo mysql_secure_installation
5. Add a gitea user
sudo adduser --disabled-login --gecos 'gitea' git6. Setup the mysql database
Using mysql with the user you specified in 4 above, or root if you chose to add it:
sudo mysql -u rootCreate the database, and gitea user:
CREATE DATABASE gitea;
GRANT ALL PRIVILEGES ON gitea.* TO 'gitea'@'localhost' IDENTIFIED BY 'gitea';
FLUSH PRIVILEGES;
EXIT;
7. Download Gitea
We need to get the Gitea image for linux arm-5, and make it executable for the git user:
sudo su git
cd /home/git
mkdir gitea
cd gitea
wget https://dl.gitea.io/gitea/1.17.0/gitea-1.17.0-linux-arm-5 -O gitea
chmod +x gitea
exit
cd ~
8. Setup the Gitea service
As a note, I prefer to use vim, you can use nano if you prefer, or any other text editor.
sudo vim /etc/systemd/system/gitea.service [Unit]
Description=Gitea (Git with a cup of tea)
After=syslog.target
After=network.target
[Service]
LimitMEMLOCK=infinity
LimitNOFILE=65535
RestartSec=2s
Type=simple
User=git
Group=git
WorkingDirectory=/home/git/gitea
ExecStart=/home/git/gitea/gitea web
Restart=always
Environment=USER=git
HOME=/home/git
[Install]
WantedBy=multi-user.target9. Enable, and start, the Gitea service
sudo systemctl enable gitea.service
sudo systemctl start gitea.service
10. Gitea is now working
In your web browser go to http://yourGitServerName.local:3000/, it’s even accessible from a different machine. You need to follow setup instructions:
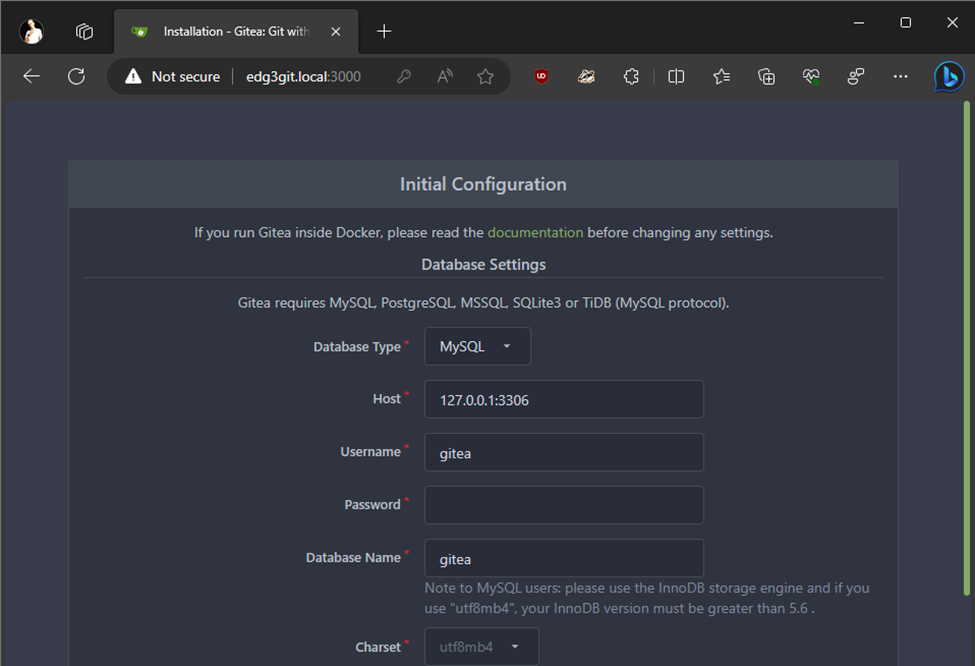
Be careful in the settings, replace the word localhost with the name you gave in step 1, for instance mine is edg3git.local

Then click Install Gitea. This can take a moment or two, don’t refresh it, just let it do its work.
11. The first Gitea view:

12. You can create an account with Register
Note, if you created an admin account above you don’t need to, you can just log in with it (I registered to create a new account).

13. When logged in Gitea is already working for you
Which would mean if you only want to use this at home, and already start adding your repos, you can.

13.1. Note: Manage git repos
You can always change the origin URL on an existing repo, for instance:
git remote set-url origin http://edg3git.local:3000/edg3/active.ActiveEFitness.gitOr, if there isn’t, replace set-url with add, you can look up more using git remote –help
13.2. Note: ssh access
You could use the equivalent command to ssh edg3@edg3git.local to ssh in for remote management if you chose to enable it in step 1. I just had to use the ipv6 address:

This is now a working server running Gitea to assist with DevOps. There are tons of places you can host your git repositories, I just felt I needed this to help with my personal projects. With the capabilities of easy DevOps available, we have a custom git server at this point.
Addition 1: Setup Wi-Fi Hotspot
To make this more portable, so you can access it anywhere by just giving it power, you can swap to using a Wi-Fi hotspot.
- Start raspi-config using:
sudo raspi-config - Navigate to Advanced Options and press Enter
- Navigate to Network Config and press Enter
- Select Network Manager with Enter and then Ok
- Select Ok and press Enter to finish
- Select Yes and press Enter to reboot
- Left-Click the network icon, Left-Click on Advanced Options, and then Create Wireless Hotspot
- Set the network name, and select the other options you’d like, such as Wi-Fi security of WPA2, then Click create to save.
There are ways to do this with the terminal, so you don’t need the Desktop environment I chose to use. I just did it this way for it to be quicker, and simpler, as it isn’t the focus of the system. The hotspot I created you would have noticed near the start, today.

Addition 2: apache2 with PhpMyAdmin
I decided I don’t want to have to ssh in every time I want to have more information from the device. A simple method is to install apache2, add php, and then add useful web services. These steps are on the device terminal, or through ssh.
1. Install apache2, and php
sudo apt install apache2 -y
sudo apt install php libapache2-mod-php -y
2. Enable mysqli
sudo phpenmod mysqli3. Restart apache
sudo systemctl restart apache24. Update the web root
sudo rm /var/www/html/index.html
sudo vim /var/www/html/index.php
Inside index.php you can add whatever you want, I just chose to add a simple folder listing (with bad web practices):
<ul>
<?php
$filelist = scandir(‘/var/www/html’);
foreach ($filelist as $file) {
  if ($file != ‘index.php’ && $file != ‘.’ && $file != ‘..’)
    echo ‘<li><a href=”’ . $file . ‘/index.php”>’ . $file . ‘</a></li>’
}
?>
</ul>
5. Setup PhpMyAdmin
cd /var/www/html
sudo wget https://files.phpmyadmin.net/phpMyAdmin/5.2.1/phpMyAdmin-5.2.1-english.zip
sudo unzip phpMyAdmin-5.2.1-english.zip -d /var/www/html/
sudo rm phpMyAdmin-5.2.1-english.zip
sudo mv phpMyAdmin-5.2.1-english/ phpmyadmin
sudo cp phpmyadmin/config.sample.inc.php phpmyadmin/config.inc.php
sudo vim phpmyadmin/config.inc.php
Make sure in config you set the [‘host’] to 127.0.0.1
Then also set [‘AllowNoPassword’] to true if you made any password empty

6. Create a Disk Space check
sudo mkdir /var/www/html/stats/
sudo vim /var/www/html/stats/index.php
<?php
// Get the free and total space of the root directory
$free = disk_free_space("/");
$total = disk_total_space("/");
// Convert bytes to gigabytes
$free_gb = round($free / 1024 / 1024 / 1024, 2);
$total_gb = round($total / 1024 / 1024 / 1024, 2);
// Print the results
echo "Free space: $free_gb GB<br>";
echo "Total space: $total_gb GB<br>";
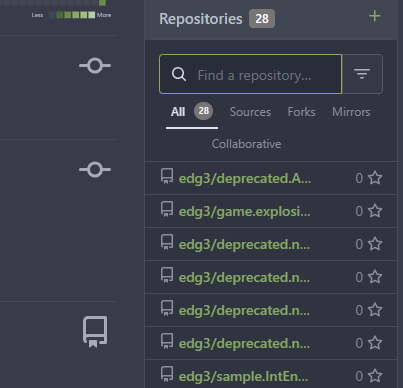
The main admin additions are now complete. This showed me, after I reviewed all my personal local repositories, around 700mb repositories I want to keep are on my own Gitea now – so I can start moving and cleaning my code folders with ease.
Addition 3: Gallery
As you may have noticed, in the image above addition 2, I also added a gallery. The idea is simple, have a way to stop the need for storing images in git repos for games. This could move towards also storing more, but why waste space with git history of an image you change over and over between versions for a while? 3 changes in commits of a 3mb image is 9mb in the repository. We can just us a .bat file inside our content folder to download the images off our Gitea Pi. I won’t share how to set that up though, as the focus is primarily on Gitea today.

Using this simple system, we can keep the repository sizes a little smaller, though you should just understand you should do your own proper version, history, and backup, control for art assets. It’s a minimal method which has so little impact in this scenario. I’m gearing towards having a set of reusable images, like the ones in my gallery at present from kenney.nl, so if I feel like creating a new game as an experiment I can focus on the code. I can extend this to allow 3D objects, but I’d rather not waste as much space on the RPi.
Final Thoughts
I guess I should finally move my Kanboard onto my git RPi; I’m already finding it way easier to figure out where I left off. Keeping track of my personal projects is difficult for me, since I have too many to go through. Now I can just search all repos with ease, in a single space, and keep working on my habit to try do a minimum 1 hour on any project of my own, every day.
This is already moving me forwards where I can see I’m successfully making progress to release my new projects, eventually. The ease of use, capabilities, and tracking are tremendous help for me.