As part of a few things I’ve been doing my best to assist with at work, I decided to refresh my knowledge of CI/CD infrastructures. Step 1, I felt like making a pipeline to deploy my Godot 4.7 games to the web for testing.
The steps have been simple for me, and might need adjustments for others to achieve, I just felt it can give a broad background on the topic for those who’d like to know how to do it themselves.
I no longer use the Kanboard I set up on my Raspberry Pi, I decided to integrate it into this system instead, in the near future. It can help to track progress, and helps to bring a feel good factor to your personal projects. I also assume you already have git installed, and at least know the basics for how to use it.
I may have forgotten to write in a step or two, below, but in today’s day and age, you know you can find the gaps with ease. It was great to refresh my knowledge from my experiments with Jenkins around 2013 for a CI/CD pipeline. This is all on my local network, but you can take a look at some VPN services to have full access wherever you might go.
Step 1: Gitea as a Service on Windows
My Desktop is still only Windows 10 at present, I just didn’t feel comfy with the extra features forced on us. That being shared, the method to set up your own gitea isn’t too tough.
1. Download the gitea windows binary, and save it where you would like to run your gitea as a service from, for example: c:/gitea/gitea.exe
2. Now create a an app.ini configuration file at the relevant to the .exe location, for example: c:/gitea/custom/conf/app.ini
Replace COMPUTERNAME with the name of your computer, and save the following into the custom/conf/app.ini, for example: c:/gitea/custom/conf/app.ini
Be sure to swap the [database] path to the same relevant location, if you’re using SQLite as I did
RUN_USER = COMPUTERNAME$

[database]
PATH     = c:/gitea/data/gitea.db
3. Open Command Prompt as administrator, and add gitea as a service (obviously, at your chosen path):
sc.exe create gitea start= auto binPath= "\"C:\gitea\gitea.exe\" web --config \"C:\gitea\custom\conf\app.ini\""If the service fails to start at boot, you can swap the config to have a delayed start:
sc.exe config gitea start= delayed-autoAlso if you don’t want to run it as a service anymore, you can delete it:
sc.exe delete giteaYou now have a gitea instance for yourself, and you can, like me, use Organisations to manage your multiple projects!
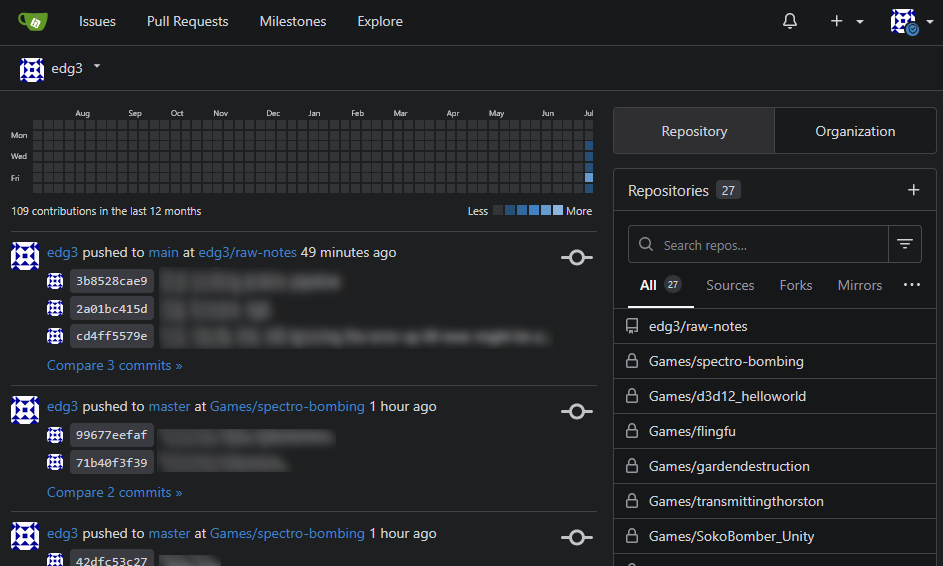
Step 2: Setup Jenkins as a Project Build Service
This might seem like a large task, but it isn’t too bad. I’ll give you fair warning, sometimes your system might give you issues with what worked for me below, but the goal was simple. Around 2013 while contracting to work at Microsoft, I started to experiment with Jenkins for my personal projects. That didn’t last too long, it was still not quite what I wanted to use back then. Recently I had an opportunity to get back at it, and refresh my small amount of knowledge on it as a whole.
So, I decided that first off: I will start out an easy method for me to deploy my own Godot game projects to my local (desktop) web service when I update code.
So, first off, start by getting Jenkins up as a service. Step 3 will get into connecting it to our Gitea, and setting up the needed certificate for https Godot 4.7 web export requires.
1. As the first note, the java version can’t be the latest 26 at the time of this post; you can use Java 25 LTS, and ensure it is set on your PATH, e.g. C:/Program Files/Java/jdk-25.0.3/bin
You can double check your java version:
PS C:\> java --version
java 25.0.3 2026-04-21 LTS
Java(TM) SE Runtime Environment (build 25.0.3+9-LTS-195)
Java HotSpot(TM) 64-Bit Server VM (build 25.0.3+9-LTS-195, mixed mode, sharing)
2. From jenkins.io, you can dowload the .msi installer, and install it on your machine. I have only a few suggestions for what options to choose for the setup:
- Default install path is alright,
c:/Program Files/Jenkins - When prompted for a service account,
Local Systemis fine to start out. A dedicated user is cleaner, but that isn’t today’s goal. - When done, your service should be available at
http://localhost:8080
3. Browse to http://localhost:8080 and finalize the setup; it guides you to where the admin password is, and install suggested plugins for starters.
You can manage the service with ease:
Get-Service Jenkins
Restart-Service Jenkins
Stop-Service Jenkins
Start-Service Jenkins
4. To access Jenkins from other machines you can open the ports:
New-NetFirewallRule -DisplayName "Jenkins Agent Port" -Direction Inbound -Protocol TCP -LocalPort 50000 -Action Allow
New-NetFirewallRule -DisplayName "Jenkins Web UI" -Direction Inbound -Protocol TCP -LocalPort 8080 -Action Allow
Please ensure you only do this with a machine on your own secure network.
Step 3: Wire Gitea and Jenkins Together
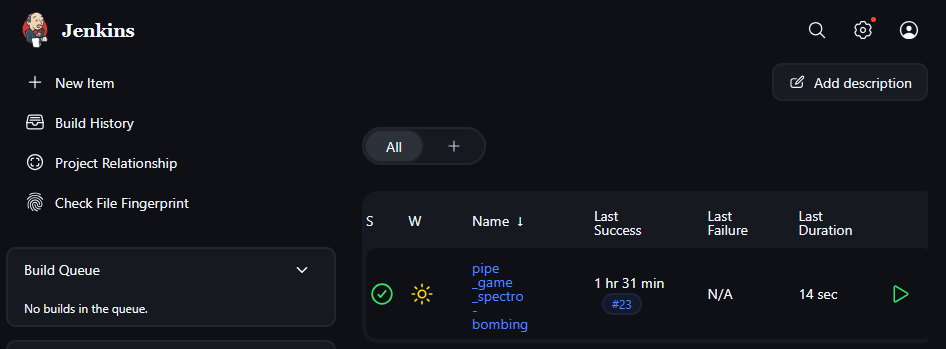
As you can see, above, I organized the first pipeline for build and deploy for a new game prototype I am having fun with, Spectro Bombing, the name for now. I won’t jump to talking about my projects, too much, for this post.
Or structure will be simple. Gitea for native source control management (SCM) with a web hook integration. We will build ourselves a Pipeline, one of the default suggested plugins. The first plan to manually build and deploy the master branch alone.
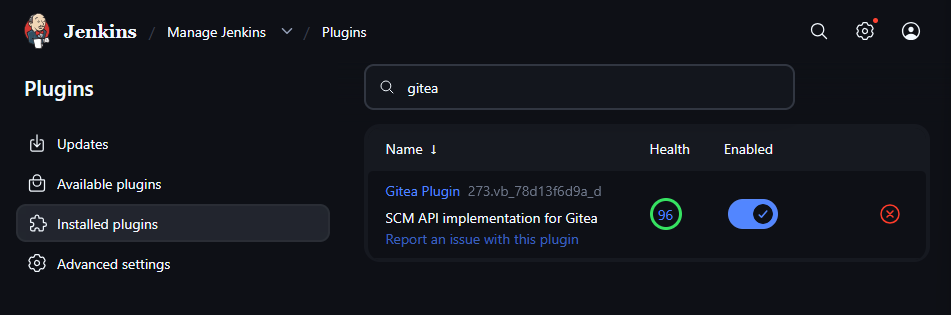
1. First off, on your Jenkins install, open Settings > Plugins > Available Plugins, and search for Gitea. Install the Gitea plugin.
2. Create a Jenkins ssh key to use for access in Gitea, note I used WSL2 openssl to generate mine.
ssh-keygen -t ed25519 -C "jenkins@desktop" -f "C:\Program Files\Jenkins\.ssh\jenkins_gitea"Then, in Gitea under your user profile (or a profile you create for Jenkins) you can import the public key (usually a .pub file) on the account Jenkins will pull/push with. I opted for only allowing pull.
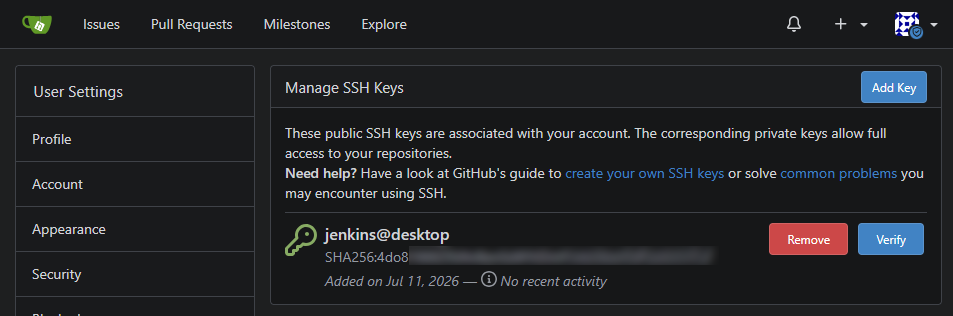
And also you need to set Jenkins to use the correct key. Go to Manage Jenkins > Credentials > System > Global > Add Credentials > Kind “SSH Username with private key” then paste in the private key there for the value, and save.
3. If you’ve managed to set the key up correctly, I hope I didn’t miss a step for the activation, you can start you first Pipeline!
Step 4: Short Introduction to Pipelines
Next up, since we have our SSH key for Jenkins to use our Gitea, we can start the first Pipeline.
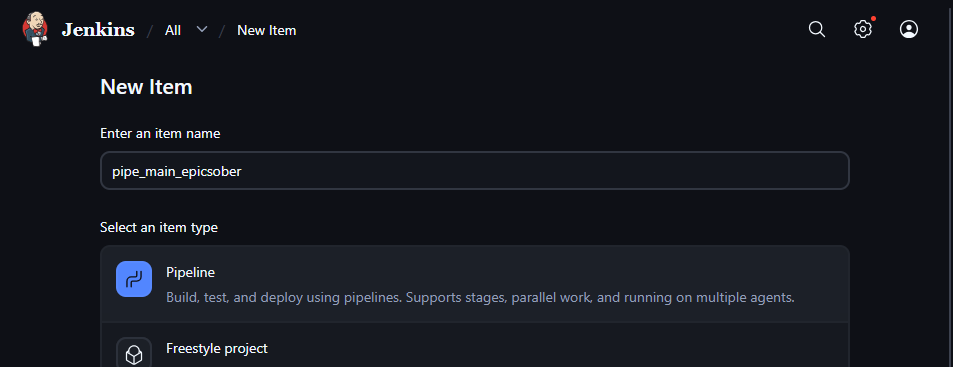
1. Create a Pipeline like shown in the image above and you will get several tickboxes and text inputs. We will just gloss over them for now.
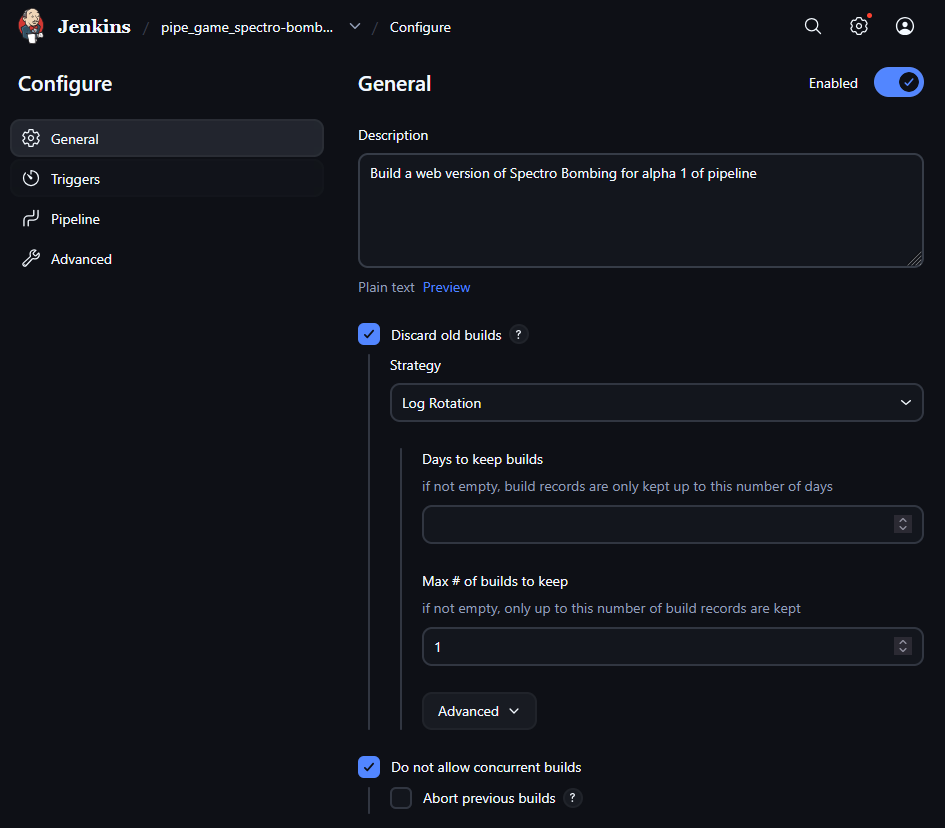
Since this is just a testing harness to build and deploy a Godot 4.7 web build onto my development web server, we won’t dive too deep into what we can do. The first base options are simple:
- Discard old builds: Ticked, max to keep – 5
- Do not allow concurrent builds: Ticked
- Abort previous builds: Ticked
- Rest of the first section: Unticked
- Build Triggers: everything unticked except
Poll SCM, left with an empty schedule. You can swap it to automated checks by polling for changes here, for instance every 5 minutes with Jenkin’sHto spread load:H/5 * * * *
Yes, this uses the usual minutes, hour, day of month, month, and day of the week, one might expect.
Next, you could use a Pipeline script which will Use Groovy Sandbox. You can find documentation and tutorials around Groovy online. Obviously, this Pipeline is to do a Web build of my Godot 4.7 project, Specular Bombing © 2026, to show it off. There are adjustments and changes when building other Pipelines, and you can set up some build services with other operating systems as you need.
pipeline {
    agent any

    options {
        timeout(time: 30, unit: 'MINUTES')
        disableConcurrentBuilds() // Prevent multiple builds of the same job simultaneously
    }

    environment {
        GODOT_PATH = 'F:\\builders\\godot_4.7\\Godot_v4.7-stable_win64.exe'
        EXPORT_PRESET = 'Web'
        DEPLOY_PATH = 'F:\\_htdocs\\games\\spectro-bombing\\'
        BUILD_PATH = "${WORKSPACE}\\build\\web"
        REPO_URL = 'http://localhost:3000/Games/spectro-bombing.git'
        ENCRYPTION_KEY_FILE = credentials('godot-encryption-key')
    }

    stages {
        stage('Checkout') {
            steps {
                script {
                    checkout([
                        $class: 'GitSCM',
                        branches: [[name: '*/master']],
                        userRemoteConfigs: [[
                            url: "${REPO_URL}",
                            credentialsId: 'gitea-http-creds'
                        ]]
                    ])
                }
            }
        }

        stage('Prepare Build Directory') {
            steps {
                script {
                    powershell """
                        if (Test-Path '${BUILD_PATH}') { Remove-Item -Path '${BUILD_PATH}' -Recurse -Force }
                        New-Item -ItemType Directory -Path '${BUILD_PATH}' -Force
                    """
                }
            }
        }

        stage('Export Godot Web Build') {
            steps {
                script {
                    echo "=== STARTING GODOT EXPORT ==="

                    // 1. Get Key (the credential holds the raw key text, not a file path)
                    def keyContent = env.ENCRYPTION_KEY_FILE

                    // 2. Define Paths (Using forward slashes for safety in strings)
                    def godotPath = env.GODOT_PATH.replace('\\', '/')
                    def projectPath = "${WORKSPACE}/specular-bombing".replace('\\', '/')
                    def buildDest = "${BUILD_PATH}/index.html"
                    def preset = env.EXPORT_PRESET

                    echo "Godot Path: ${godotPath}"
                    echo "Project Path: ${projectPath}"
                    echo "Build Dest: ${buildDest}"

                    // 3. Run PowerShell using -Command with a here-string approach or simple construction
                    // We wrap the whole block in single quotes so Groovy doesn't parse escapes,
                    // then we interpolate the values into the string before execution.

                    powershell """
                        \$godotPath = '${godotPath}'
                        \$projectPath = '${projectPath}'
                        \$buildDest = '${buildDest}'
                        \$key = '${keyContent}'
                        \$preset = '${preset}'

                        echo "Starting Godot..."

                        # Run the export (double-quoted so PowerShell expands the variables)
                        # Not capturing output into a variable, so Godot's own console output is visible in the build log
                        & \$godotPath --headless --path "\$projectPath" --export-release "\$preset" "\$buildDest" --script-encryption-key "\$key"

                        if (\$LASTEXITCODE -ne 0) {
                            Write-Warning "Godot exited with code \$LASTEXITCODE (can happen even on a successful export, e.g. harmless startup warnings under the Jenkins service account). Verifying by checking for the output file instead."
                        }

                        # Retry for a few seconds - large output files (index.wasm) can briefly
                        # remain unavailable right after Godot exits (e.g. AV scan on a new large file)
                        \$found = \$false
                        for (\$i = 0; \$i -lt 10; \$i++) {
                            if (Test-Path "\$buildDest") { \$found = \$true; break }
                            Start-Sleep -Milliseconds 500
                        }
                        if (-not \$found) {
                            throw "File Missing: \$buildDest"
                        }

                        echo "Success!"
                    """

                    if (!fileExists("${BUILD_PATH}/index.html")) {
                        error "Export failed: index.html missing on disk."
                    }
                    echo "=== EXPORT COMPLETE ==="
                }
            }
        }


        stage('Deploy to Web Server') {
            steps {
                script {
                    def deployDir = env.DEPLOY_PATH
                    def timestamp = new Date().format('yyyyMMdd_HHmmss')

                    echo "Deploying to ${deployDir}..."

                    powershell """
                        Set-StrictMode -Off
                        \$ErrorActionPreference = 'Stop'

                        if (-not (Test-Path "${deployDir}")) {
                            New-Item -ItemType Directory -Path "${deployDir}" -Force | Out-Null
                        }

                        # Backup existing files
                        if (Test-Path "${deployDir}") {
                            \$backupName = 'spectro-bombing-backup-${timestamp}'
                            Copy-Item -Path "${deployDir}" -Destination "..\\\${backupName}" -Recurse -Force
                            Write-Host "Backup created: ..\\\${backupName}"
                        }

                        # Clear old files
                        if (Test-Path "${deployDir}") {
                            Remove-Item -Path "${deployDir}\\*" -Recurse -Force -ErrorAction SilentlyContinue
                        }

                        # Deploy new files
                        Copy-Item -Path "${BUILD_PATH}\\*" -Destination "${deployDir}" -Recurse -Force

                        Write-Host "Deployment complete. Files in directory:"
                        Get-ChildItem "${deployDir}" | Format-Table Name, Length, LastWriteTime -AutoSize
                    """
                }
            }
        }

        stage('Verify Deployment') {
            steps {
                script {
                    def requiredFiles = ['index.html', 'index.wasm', 'index.pck']
                    def missingFiles = []
                    def deployDir = env.DEPLOY_PATH

                    powershell """
                        \$deployDir = '${deployDir}'
                        \$filesToCheck = @('${requiredFiles.join("', '")}')
                        \$missing = @()

                        foreach (\$file in \$filesToCheck) {
                            if (-not (Test-Path (Join-Path \$deployDir \$file))) {
                                \$missing += \$file
                            }
                        }

                        if (\$missing.Count -gt 0) {
                            throw "Deployment verification failed. Missing files: \$(\$missing -join ', ')"
                        } else {
                            Write-Host "All required files present."
                        }
                    """

                    echo "Verification passed."
                }
            }
        }
    }

    post {
        always {
            // Clean up workspace build directory on the agent
            powershell """
                if (Test-Path "${env.BUILD_PATH}") { Remove-Item -Path "${env.BUILD_PATH}" -Recurse -Force -ErrorAction SilentlyContinue }
            """
        }
        success {
            echo '========================================'
            echo 'Build and Deployment Successful!'
            echo "Game located at: ${env.DEPLOY_PATH}"
            echo '========================================'
        }
        failure {
            echo '!!! Build or Deployment Failed. Check logs above.'
            archiveArtifacts artifacts: '**/build/web/**', fingerprint: true
        }
    }
}
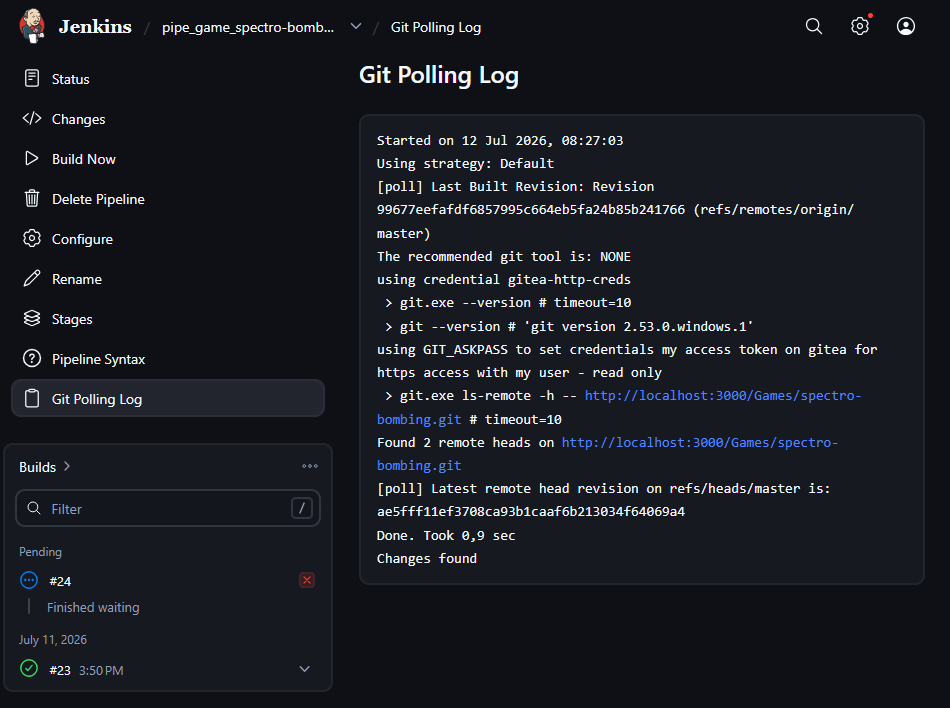
As you can see, at the start we set the environment variables, so that Jenkins can access what it needs. Also, yes you can be less lazy and not use your own git credentials for your gitea, but in a simple manner, this Pipeline needed a Windows service user, called it jenkins, the godot-encryption-key, and on gitea on my account I added a User Settings > SSH Key to use with only read access. As a reminder, the credentials shown above.
Second note on the Pipeline above, I started to add shaders and it times out in the wait time, so I extended it for the time needed to build through the Godot exe.
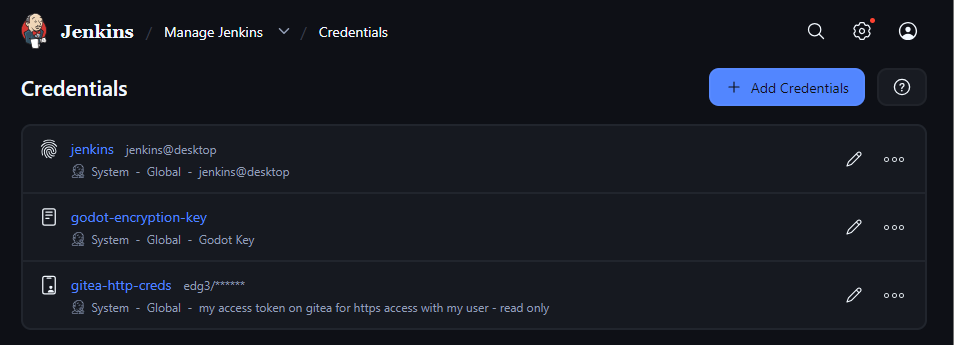
Take note, the git poll operation might not fall on the 5 minute mark, if you activate it at 7 past the next poll will trigger at 12 past, I’m unsure if rebooting would change this scheduled time. Not an issue, just a note, you don’t have to panic.
As you can see below, the shader I added is starting to work, and I will be working on the lighting in the near future for this project. I won’t go into a deep dive on setting up your own WSL2 apache2 instance using a folder the Windows Jenkins can deploy to, just feel I should share you should ensure you setup the SSL certificate for your web server.
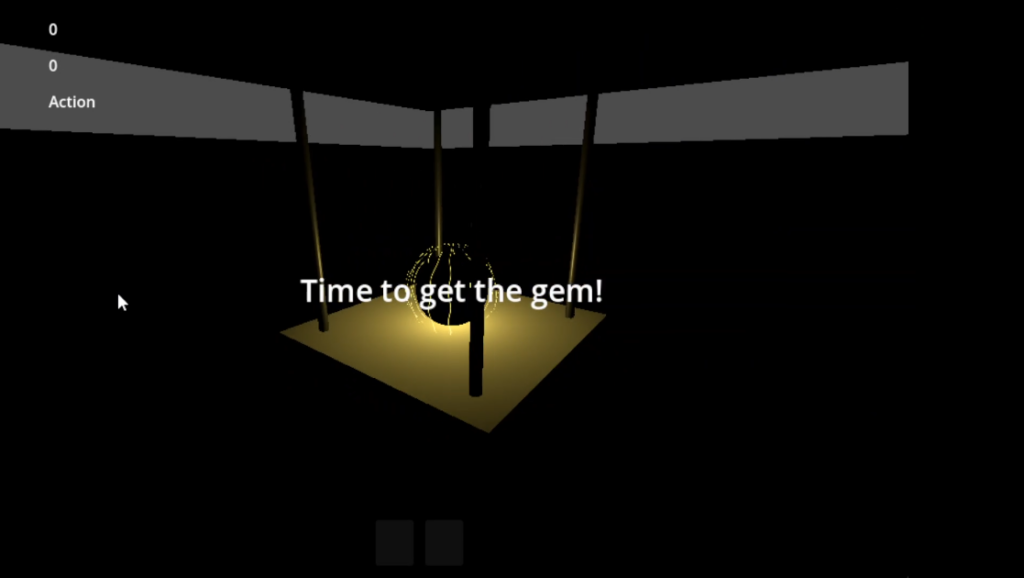
Today isn’t meant to be a game development tutorial, I just felt like showing you can build cool things in this first step of using Pipelines for automated build and deploy.
Expansions
If asked, I might expand on this in the future, but it feels good to have a simple project automatically build when I push to the master branch. Yep, under the project settings add a rule for Branch Protection, can Disable Push, and set the review requirements for yourself. Hence, master needs a PR and review(s), a similar verification branch can be used for the dev testing deploys (to games/_testing/project-name instead of games/project-name for web versions, for instance), so as an admin you can ensure your developers (cough, you) get your code reviewed before you push to the master branch, or even the verification branch.
Similarly, I upgraded the pipeline – if no changes on master, it checks if there are changes on branch verification, and now I have an easy method to verify my changes before pushing master to production. It could easily now either, a. make different build and deploy environments, or b. just make separate Pipelines for each environment. For today, I’m keeping it simple as a solo developer CI/CD pipeline.

There we go, after the initial post actions, I fixed the lighting, adjusted the shaders a ton, and auto built then deployed my verification branch to my testing harness. I just chose the games on web to show it working for the post, there are more possibilities you can use a pipeline like this for, in the future.
Next, obviously, will be porting all my other project (MAUI C# Blazor apps, APIs and Services, to build and deploy changes on several platforms such as Windows, Linux, Android, and web) into my Jenkins Pipelines for fun again.